Packet capture from MikroTik to Wireshark
Today, I will describe how to analyze traffic passing through a MikroTik router on your local machine with Wireshark.
We will configure MikroTik router to stream captured packets to our computer where we will be capturing and analyzing them with Wireshark.
1) Wireshark Installation
On Fedora you install Wireshark by:
$ sudo dnf install wiresharkThen add your user to a “wireshark” group:
$ sudo usermod -a -G wireshark "$USER"Then log out and log in again to let the usermod change to take effect or simply reboot your system:
$ sudo reboot2) Configure Wireshark filter
In Wireshark menu, click on “capture” and then select “capture filters”.
It will open a new window with capture filters.
Click on “+” button to add a new line to the list. On the added line, write there a name of the filter (for example “MikroTik sniffing”) and set “udp port 37008” as the filter.
3) Start the capture in Wireshark
On Wireshark’s main screen, select the filter you just created (click on the small green flag) and then start the capture.
4) Configure MikroTik router to forward captured traffic
You can do this configuration via SSH, Telnet, WinBox or WebFig.
I will show you how to do this via SSH/Telnet.
First, connect to the device (ssh in my example):
ssh ADMIN_USER@IP_ADDRESS_OF_YOUR_ROUTER -p PORTThen configure sniffer options:
/tool sniffer set streaming-enabled=yes streaming-server=192.168.1.100
/tool sniffer set filter-interface wlan1,wlan2
/tool sniffer set filter-ip-address 192.168.1.150/32- streaming-enabled – enables forwarding of packets.
- streaming-server – IP address of the host where the Wireshark is running.
- filter-interface – interface(s) where the capture will happen. (In my case, I have two radios 2,4 GHz & 5 GHz and I selected both)
- filter-ip-address – you can limit the sniffing to only a specific IP address(es). (In my case, I selected only IP of my Smart TV as I wanted to see what kind of traffic it sends/receives from Internet)
Start the capture:
/tool sniffer startReview the sniffer status:
[MYUSER@MikroTik] > /tool sniffer print
                     only-headers: no
                     memory-limit: 100KiB
                    memory-scroll: yes
                        file-name:
                       file-limit: 1000KiB
                streaming-enabled: yes
                 streaming-server: 192.168.1.100
                    filter-stream: yes
                 filter-interface: wlan1,wlan2
               filter-mac-address:
              filter-mac-protocol:
                filter-ip-address: 192.168.1.150/32
              filter-ipv6-address:
               filter-ip-protocol:
                      filter-port:
                       filter-cpu:
                      filter-size:
                 filter-direction: any
  filter-operator-between-entries: or
                          running: yes
Stop capture:
/tool sniffer stopAnd that’s it!

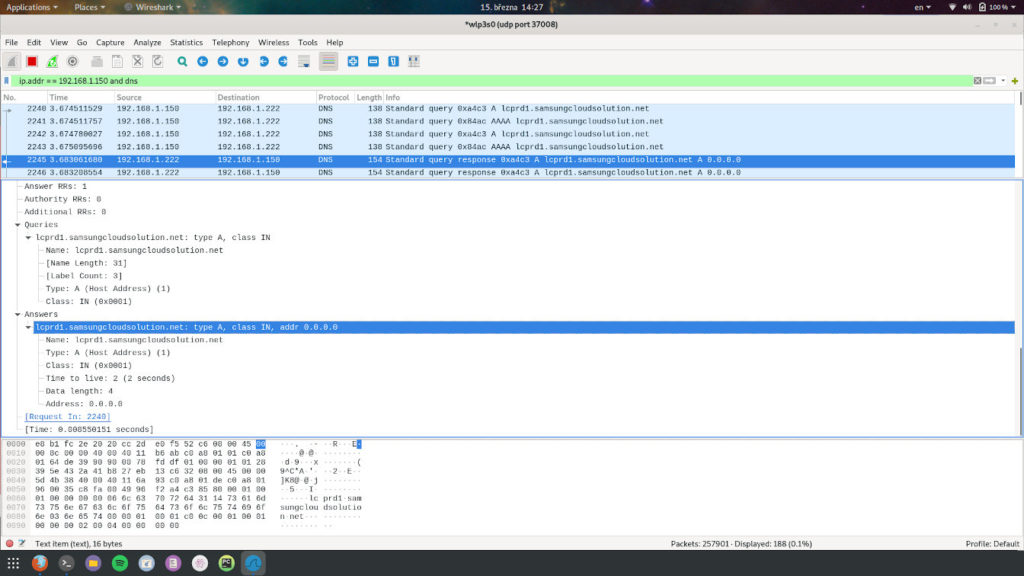
In this screenshot, you can see that I applied two extra display filters to see really only traffic from/to 192.168.1.150 IP and DNS related traffic.
I did this as I was investigating if my Pi-Hole works as expected and blocks beaconing hostnames for Samsung Smart TVs.